Thursday, 17 December 2015

Week 12! Final Review!

The Final Animation (Without Sound)

Overall, I'm really happy with how it all turned out. As I edited it together in premier pro I took out quite a chunk of scene one and two, and a small bit from scene 3 at the end.

After all this I've noticed the way the tie fighter in scene 3 slows as it nearly hits the other tie fighter. That does annoy me every time I watch the video now but it's too late to change it.

The good parts


  • Scene Two's overall feel of being very ominous and forboding. I feel that I really hit that mark. On that scene.
  • The crosshair in scene 3 I really love, and the camera angle from inside the cockpit. I'm glad I deviated from my plan to make that scene as it was a lot of work to have all the moving pieces come together, and it was also my first time animating the laser shots.
  • That I made too much, making too much and having the part-luxury and part-tough-decision to cut parts out to bring it down to 30 seconds was great. It was a lot easier to cut parts out than it would be to make more afterwards.
  • Scene 4's explosion and camera angle. It really creates an epic feel of 'cool guys don't look at explosions'
  • The exhaust lights, I just really love the look of them. It may be difficult to notice but in scene 3 the lights flare up just as the lambda shuttle kicks into a higher gear and shoots off to safety.
  • Figuring out the visibility track so the lasers and ships could disappear. While it didn't help for scene three's ships as Max kept crashing for that, it worked perfectly for Scene 4's ships and lasers.
The improvements and bad parts plus what I learned from them

  • As I mentioned above, the Tie Fighter in scene three really bugs me and I wish I had time to change it. 
  • Scene 1, it doesn't feel as full of wonder or give the vast feel it should when it's together with all the other scenes. I think if I had remade this Scene I would make the camera's arc a lot longer out to the side, so you really get that feeling of the vastness of space. 
  • The crosshair in scene 3. I had no good ideas on how to get rid of the crosshair once the shots were fired and everything started to happen, so it just seems to sit there in the middle and obscure the action. I really feel as though there could be simple solution to that but I can't visualise it.
  • Number of Tie Fighters. When doing the original storyboard I think I underestimated how long a scene would take, especially while having to have it slow enough for the viewer to see whats going on. I think I could have minimised it to 3 tie fighters if I had enough time to go back and edit everything.
  • Positions of tie fighters when transitioning from scene 3 to 4. If I again had some more time and more patience with 3DS Max's crashes I would have attempted to have it line up properly for a more seamless transition. 
  • I feel like Scene 3 really has no feeling to it, and it might be slightly boring but while building it I imagined it to be a lot better. It may just be me, but while I'm still really proud of it as a collection of effects and hard work, I really don't think it hits the mark on how exciting it should be, compared to how long the scene actually is. Perhaps if I remade it, I'd have the X-Wing fire really quickly at first, and then swoop around a bit more, since the cause may be that the X-Wing is fairly static and it just sits there and watches.
  • After watching the finished project I would have liked to have some planets etc. in the background, but by that point it was simply too late. I should have made a simple version of my final animation, perhaps with just grey blocks first to see the space I used.

Saturday, 12 December 2015

Week 11 - Workaholic Week

Scene Three Begins!

For scene three, I reused the file from number two (and I did the same for scene four too!)
I removed all the path constraints from the scene as I could have the ships not be moving, and it would look nearly the same since they'd all be going at the same speed. To give the illusion of movement though, I added a new animation layer (not without several crashes) just as Mario had showed us, and used the noise XYZ tool to create a slight rumble on the X-wing.

Also, to make the viewer feel like they're more in the position of the pilot, I've added a crosshair made of two planes that are self-illuminated and have a nice red glow.


Then when I dragged the scene around to see how it would look, I found there was something missing, so I added two circles that would close in to show the targeting more clearly. Originally I had them close in at the same time, but by accident when I was trying it out I dragged the bigger ring in quicker so it overtook the smaller one, and it looked really good, so I ended up sticking with that. In addition, when I was creating the lasers again (as they lost the glow I made for them back in scene 1 as a practice) I realised the X-Wing lasers' were red, so this would be camouflaged with the red crosshair. I decided to make the crosshair self illuminated neon green from that point, as that's a fairly common colour for a HUD or aiming system.


I didn't know at this point how to make the opacity change with keyframes so I had the lasers start at 1% on their paths, so they'd ping back out of view as soon as they reached the end. This worked fine for the scene, but as you'll see in the next scene I had to learn how to change opacity quickly.

A feature I really liked when I was doing the path constraints was the ability to pull them around one point at a time just like the editable polys. This made planning paths so much easier as I could align the Tie's path to the very tips of the X-Wing lasers.

As you can see here in the faint blue square there's a path leading from the tie fighter of the screen. As I couldn't do opacity yet this was the method by which the Tie Fighter left the screen in an instant. I keyframed one end at one frame, then keyframed it at the off-screen other end on the next frame. This appeared to work perfectly too!

At this point there were no explosions as I hadn't looked into them yet, and when I asked Chris if he knew a solution he said that they could be done in premier pro. (Though as you'll see further down, I did learn how to do them in 3DS max, and that will be how they are in the final version.)


Scene 4 - Final Scene

After loading in my finished first 3 scenes into Prem Pro and cutting out 100% useless parts to make myself some time I was left with about 8 seconds. Which completely derailed my storyboard even further, there would be no epic battles and swoops and weaving and dodging lasers. I was then looking at doing side-on shots from the distance showing the ships firing at each other, and then the Tie's exploding as they went past. All this would be on the diagonal like a Dutch angle to make it look uneasy and replicate something similar to the single stroke battle. However, this really didn't look good from the side, so I tried seeing things from the Tie-Fighter's point of view and I had the idea that both Tie's could be shot, and then career into each other, exploding as the X-Wing flew 'into' the camera, which would give a cut to black easily.

 While I was still on the diagonal single stroke battle concept  I made up the above scene, but then I thought: Why not just make the camera diagonal? It would make the laser placement so much easier.
So I made everything relatively flat, and I think that helped a lot even after I changed the idea slightly.
You can see in the shot above the paths of the lasers in green. At this point I'd made the X-Wing rotate (in one failed attempt I accidentally made it do two barrel rolls, and it was spinning like crazy!) I just had to make the lasers disappear again. So I HAD to learn how to do the opacity, and after a LOT of crashing (every time I'd open the dope sheet or try to assign controller, or add keys)

Eventually after many many tries it worked, and it was so much easier than I realised, and for such a good effect!

Now, with all the scenes complete I had to add explosions. And really there isn't much to say that this video: https://www.youtube.com/watch?v=nRyFJ9kK1ko doesn't cover. I simply used the tutorial on the explosion in the second half of the video to create all the explosions you'll see in next week's post, and in under 15 minutes I'd added explosions to both scene 3 and scene 4, and they looked amazing. It was annoying that they only showed up at render time, but I could simply render single scenes or groups of 5 etc. To see the effect. I think they work really well, and they're so effective.

I'll have to learn after-effects in premier pro another day!

Sunday, 6 December 2015

Week 10

Finishing Scene 1

At the start of this week I completed my scene 1, not without a couple of problems. Whenever I'd exit a file, 3DS Max would return a null reference exception. Opening a file would cause it to crash instantly about 6/10 times, and also the random crashes would still happen. As it would also crash whenever I clicked render, Chris let me put the file onto his computer to render, but it still crashed even on his installation so I thought there may be a problem with the file. Which leads onto my next solution:

On the left in the hierarchy, you can see I've started to group things into a 'stuff' group to merge them into a new file easily. So I tried to do that, and thankfully I was able to get it to render.

On a brighter note, I changed the arc of the camera and shortened the paths of the ships so the camera swoops out of the way of the ships as they move towards it faster than they did previously, plus as it moves back into the ships' paths at the end, it gives a nice effect which I really like. When I edit it, I'll make sure to keep that movement in, as it gives the viewer a chance to take it all in for a second before the X-Wing comes to ruin the empire's day.

Scene 2

To save time I repurposed my first scene's file to make the second scene's file. This was to keep the lighting in similar places and ships on the same scale, along with the sky sphere. The tracks that the empire ships move along is basically the same. I simply moved the camera, and added in the X-Wing in their places.

Originally I tried just the empire ships and the camera moving. This didn't give a very good effect, as you could really notice the X-Wing wasn't making any progress.

Secondly I tried the camera moving backwards, the X-Wing moving forwards slowly, and the empire ships (of course) moving forwards still. This meant the camera would change angle really fast, and it took any tension or surprise out of the scene when the X-Wing's nose first peeks into the frame. It also gave the shot a more lively feel, when really it should be slow and methodical as the X-Wing is sneaking up on these unsuspecting ships below.

Finally, I went for having the camera static, but following the Lambda shuttle's position. I did have to adjust the X-wing's position slightly to get it in the centre but I'm so happy with that feeling it has as the X-Wing moves in with the relatively tiny empire forces down below:

And the X-Wing just keeps coming (almost filling up the screen) and seemingly has no end until you see the exhaust lights:


And it also gives the effect that the camera is pulling away smoothly, and intensifying the size difference between the X-Wing and the empire ships:

Side View:


Also while experimenting with this, I tried putting a camera into the cockpit of the X-Wing and it came out looking pretty nice, so I might change my plans for scene 3 to incorporate a shot similar to this experiment.


While it would deviate from my storyboard but I think it would be worth it to get a really good shot with a LOT of polish. I could even try to add in a HUD or aiming target. I also need to make the window frame and the side windows 2 sided materials so they show up in the render.


Saturday, 28 November 2015

Week 9 (A long post!)

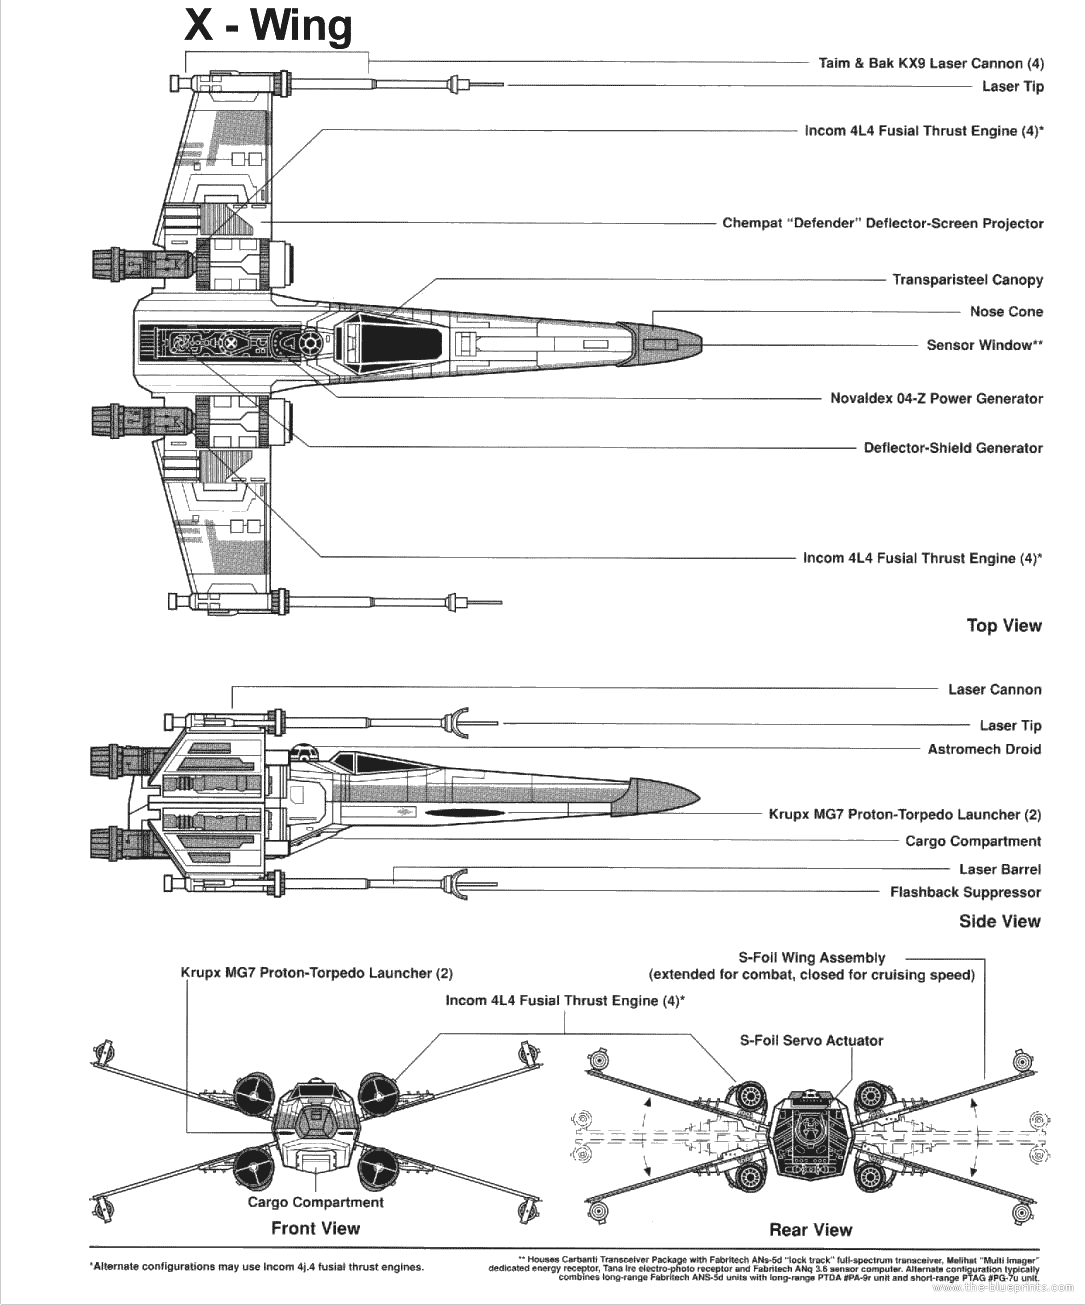
This week I finished texturing my X-wing, there's not much to say about it as it was simply UVW mapping like the tie fighter. I did the wing and body seperately, and used a solid colour for the rest. Again I modified a picture I found online, which was a blueprint of the Xwing that I coloured in and airbrushed parts out of. I do like how it looks with the textures. If I had a bit more time I would have liked to texture the whole thing, or put a different texture on the top and bottom of the wing, but as it is they're the same.


Also this week I rendered a test scene I made. (I can't remember if I made it this week or last week, I just found it again on my removable hard drive), which was just an experiment in texturing, animation, cameras and lighting. It shows a "moon" moving over a height mapped plane, with a 'skybox' sphere, and a light is attached to the moon for a day/night cycle type effect. My friends know this scene as "Hillary Moon" as in class I had attached an amusing picture of Hillary Clinton to the moon as a texture so her face would always be watching you, much like the moon from the legend of Zelda. It detached the textures when I brought the scene home, so I've replaced the textures with 3DS Max samples, and I've added a self illumination effect to the moon.

I learned a lot from making this, if only just basic things. It showed me how to get it all to work together. I'm pleased with how it came out but it's simply a test. In hindsight I should have added a glow effect to the moon to practice that too, but I can test it when I make the lasers.


Scene 1
The whole cast together on set! I merged them all into the Scene.


As the first scene is going to be a simple fly-past of the camera with the empire's ships, I just disabled the X-Wing for this scene.

I used directional lights with a volume light effect added to make exhaust lights on the X-wing and the lambda shuttle. Though when I rendered it I realised my omni lights were incredibly bright, so they've been toned down for the final recording.

As this scene was slightly longer than intended, I increased the length of the clip to 200 frames. As I was going to render at 23fps in premier pro, this is actually longer than it sounds which worried me slightly, but I'm sure it will be okay. Since the end of the clip hangs on for quite a while as the ships pass, this means I'll have plenty to cut out when it comes to editing the final animation, and it also gives me some leeway to fiddle around with the length of the other clips.

I'm happy with how it plays so far, though I could change the speed of the ships and the the camera's arc to make the shot slightly more exciting as it appears quite boring at the moment. I'd like to have the camera swoop out of the way at the last second.

The main problem I'm still facing is 3DS Max constantly crashing and losing my most recent changes. Its begun to crash so often I can never get past 3 autoback files. Autoback 4 and 5 are from when I was still creating my models. I've repaired the installation, however this has not solved any issues at all. I'll have to look for more fixes next week.


Saturday, 21 November 2015

Week 8 - Part 2

This week I only did a small amount of work on my Tie Fighter. Using photoshop and the exported UVW maps I created this by cutting up an existing image from google images using 'draw selection', 'opacity' and the layers function in university on photoshop and at home on gimp. (When I found the ones I made in photoshop wouldn't export to gimp correctly, even as a .tiff file, so I had to remake them with the wing panels adjusted to fit better). To make textures for the rest of the ship I simply used varying shades of the colours from around the edge of this texture so they would all match. The window frame for example was a bit darker. I won't post those as they're simply blocks of one colour as I didn't use UVW on those.

Also to edit the individual textures I learned how to use open and open recursively on groups. Up until this point I'd been using explode and regrouping everything. This would have saved me a lot of time if I'd learned it earlier.
I would have liked to add more detail to the cap in the middle of the wing, and the body, but I'm a very bad artist, and I think it looks okay without the detail cluttering it up. The iconic look of the Tie Fighter is there thanks to the UVW on the wings, and the colouring is also there.

Friday, 20 November 2015

Week 8

This week in our lecture we watched a couple of pixar shorts and identified the techniques and uses of said techniques.

Going back to week one's storyboard, I intended to have a shot looking down onto the cluster of empire ships as the X-wing slides into view ominously and quietly to obscure the view of the  empire ships. I think as far back as week 1 I felt that that would be a good shot, even if I didn't know why. In hindsight and with the knowledge that Steve gave us this week, the shot itself puts the viewer into a position of power and highlights the "power" that the X-wing has over the ships below by its stealthy 'sneak' up on them. It also puts the viewer higher than the X-wing which gives the viewer the feeling that they are currently at higher power than the X-wing as they can see everything going on below.

During the fight scene in the second half of the animation I also hope to have some views from inside the cockpit of the X-wing as it gives the viewer the feel that they are also the hero of the scene and makes them happy for the X-wing pilot as he takes out the empire's forces. It will also ramp up the excitement of the scene as the viewer can only see part of the battle which will allow me to hide some ships movements from the viewer and create tension, not to mention the viewer seeing lasers come towards them.

Also while watching 'For the Birds' https://www.youtube.com/watch?v=pWIVoW9jAOs Ipicked out a few techniques to practice analysing said techniques.

  1. from 00:17 to 00:28 they use a medium range shot that follows the telephone wires along to show that there is plenty of space, and when the small bird does come to land on it, it shows the viewer that this bird is small and possibly makes the viewer feel that it is cute.
  2. from 00:28 to 00:47 the picture is zoomed in to show that in the bird's world at least, they are very important because each bird takes up more visual space, this is intensified when the birds start to squabble as they all are selfish and angry, which shatters the 'cute' aspect of the previous shot.
  3. The camera then begins to zoom out until 00:54 which shows all the little birds are the same, and this sets up the next shot which reveals the big bird all alone, compared to the tiny ones. This shows the viewer that the big bird is probably not friends with the small ones at all, and is all alone compared to their group.
  4. At 00:58 there is a close up of the birds as they all look on in horror at a seemingly harmless big bird. This is similar to other shows and films with teenage groups when an outsider approaches the 'popular' group and they are shocked that  the outsider wants to join them. This is then reinforced by the following shots where the birds start to make fun of the big bird while they know he is watching.
  5. The small group and big bird are not shown in the same shot until 1:17, and even then this shot is just there to show the little ones running away and separating themselves further from big bird.
  6. There is a close up of the small birds on the wire at 1:38 which gives a claustrophobic feel, you can't even see the whole big bird and this shows he's taking up 'too much' space in the shot, meanwhile all the little birds are squished together and nearly 5 whole little birds ARE in the shot.
  7. 1:51 when the big bird tips over once again plays with how much space everyone takes up. The little birds all fit in, while only the big birds feet and legs are on screen. it makes the small birds look like a very close gang, with the big bird trying to stay a part of it, even in such a small way.
  8. 2:16 is the shocking moment when it zooms out fully for the first time after the wire has bent, and reveals to the audience what the small bird on the left just noticed in the shot before. They're nearly on the ground already. The big bird isn't going to fall hard, but the small birds are going to take most of the fallout from their bullying.
  9. 2:56 has just the big bird taking up the screen and this shows the smaller ones finally value him as they're willing to give up their own space on the rest of the screen to use the big bird to hide themselves, leaving the big bird with all the space and the small birds with none as they were the bullies. 

Thursday, 12 November 2015

Week Seven - Final Models (and finishing the lambda shuttle)

Lambda Shuttle

In addition to finishing my ships, I had a ton of work to do on my Lambda shuttle. I was sort of putting it off because the round edges on everything was quite a scary prospect. I shouldn't have left it so late, but I completely remade the body, and the head. I'd been overcomplicating it before with the cylinders attached to the cube and MSmooth tool and everything. I went back to basics and started again, but this time I used a Chamfer box. I converted it to an editable poly, and used the scale tool to grab and manipulate just the curved areas around the edges. This gave the body of the ship a very pleasing shape. and also removed roughly 2000 polygons, which was just crazy.
Before and after shots of the body:

It was fairly easy adding the wing, and at this point I'd not remade the head of the ship as I'd left it to one side after testing out a very light curve over the top of it with the chamfer tool. However, later on I'd remake it too to give it a wider and more sturdy metal feel instead of just a flimsy thin covering. I like the shape of the new headpiece a lot more than the old one, and it allowed me to fix a lot of the problems with the first headpiece where it wouldn't fit onto the 'neck' that well, or work particularly well with the chamfer tool.
Left: Final, Middle: Work in progress Right: First headpiece.

I feel like the left one obviously has a more pleasing shape to it, and since I'd built it with quite a bit more experience than the first time I was able to make it much nicer to work with. I'd made the mistake of deleting a lot of edges and vertices and so on from the first one, and I could build this one without having to make that same mistake.

I was very proud of myself when I made the vent on top of the ship, it required quite a bit of forethought to make it, and quite a lot of aligning and boolean.


After I'd made the base shape of the ship, with the body and main parts of the wings completed, the rest was quite easy. I'd use the autogrid tool to add on detail, and then just drag vertices, faces, edges etc. and mirror it as required. Probably the hardest detail to do was the panels on the bottom wings because they were at a 45 degree angle, autogrid didn't seem to like it that much and I had to rotate a lot of the pieces to line up. It was hard and frustrating work, but seeing the completed ship made it worth it in the end. 

Final Ship Evaluation

Lambda Shuttle


I hadn't left myself heaps of time to complete all the detailing on the lambda shuttle, and I should have allocated myself more time to do it. I'm not really that happy with the job I did on the underside, however I'm not intending to show the audience the underside in the animation, so I'm not too worried. I did really like the look of the detailing I did on the backside of the ship though, with the hubs and pipes connecting them. I thought that it was simple but effective.
As with all the ships, I feel like I matched the source material really well with the proportions, mainly because I used the blueprinting technique that Steve showed us in the lecture. So most of the main proportions are correct for ALL the ships. However especially on the Lambda Shuttle, I did have to make some adjustments as the blueprints didn't seem to look quite right compared to other images of the ships, so I did make some adjustments there and perhaps the middle section of the lambda shuttle the trapezoid section in the middle of the main body could have been improved, but it looked tall enough in some material and too small in others so I'm fairly unsure.

Tie Fighter

 If I had to do the Tie Fighter again, I wouldn't merge the layers of the wings into one object. That would be the biggest change I would make. Perhaps I would also add some more detail to the underside too. Also I feel as though I've wasted a lot of polygons on the tiny vents I created around the wing hubs. It feels like there should have been a much more polygon efficient way to get the vents to look good, but in the interests of time I simply went with making a small vent and putting it into place on the wings. I had to make an alteration here from the source material. In the original Tie Fighters, the vents on the wings are just to one side. I tried this on my Tie but it made the hexagon look slanted, so I made the decision to place them in the middle between each 'spoke' on the wing, and I think it looks a lot better. I'm still very happy with the arms on the wings, and I really feel like I've come a long way since my awful Tie Fighter on week one (or two, maybe?)

X-Wing

Out of all three models, I'm probably most attached to my X-Wing, even though I think my Tie Fighter might be better. The main issues I had with the X-Wing were the underside of the wings (For some reason the boolean tool wouldn't cut indentations into them, so I decided to make them stick out slightly instead,) the back part of the engines which look slightly bare, and the curving of the long nose of the ship. I tried to make the nose of the ship as perfectly as I could, but it just wouldn't look right when I'd straighten it out, so I left the curve in. The tip of the nose is exactly the same as from the first attempt many weeks ago, it was so difficult to make the first time I refused to remake it, but I think it looks perfectly fine. The guns are also the same, if slightly squished (and with a little more detail). The cockpit was so difficult to get right in relation to the raised platform with R2D2 behind it. In every image it's slightly different. I found a way to make it look nice and went with it. The body of the ship is slightly narrower than the blueprints to accommodate the cockpit, but I think it works well. I'd like to redo the underside of the wings, but I think with materials applied they'll look a lot more acceptable.

Overall my time spent with 3DS max so far has been a rollercoaster. The constant crashes and backtracking because of this has made me hate the program, but I really love how it all just seems to work (when its not crashing). Working with editable polys is actually quite intuitive and nice, because as I said it just works exactly how you'd naturally try to use it. The only exception to this is not being able to weld two points that aren't on the same face, but it's an easy workaround. I think in the end it was worth it because making these ships has really opened my eyes to how much time it must take people to make humans or monsters, and even better versions of the ships I've made. I'm looking forward to animating, as the camera and lighting seems just as intuitive (minus the shadows being off by default).


Saturday, 7 November 2015

Week Six

UVW Mapping Test

During this week, I tested out UVW Unwrapping on a simple cube just to get used to the basics.


I accidentally drew on the 'Hi' upside down, but since Steve showed us in the lecture how to change that, it was no problem:


X-Wing

This week for my X-wing I completed the main body, and a small thing that I forgot from week five: 
I actually successfully used autogrid to do some bolts on the wings, and I'll definitely be using it in future to to smaller details. I'm still not happy with using it on larger shapes. For example, I did use it to add red 'paint' to the wings. I'll be able to remove the 'paint' when I do the materials, but I think it looks nice for now.
 I did go back later in the week and add some more detail and nearly finish the ship altogether. I just need to go through and look over all the object names for any that I've missed, and maybe change around some of my groupings. I'll post an evaluation of it next week with the two others.
I think it will be really easy to texture the details, since I've made them seperately. The body of the ship and the wings may need UVW unwrapping, but I'll have a look when I get around to texturing. The gun might be slightly difficult to texture since I didn't remake it as seperate cylinders as I did with the engines (I did slightly squish it inwards with the scale too, as it looked a bit wide).
Tie Fighter

I couldn't believe how much I actually got done this week, not only did I do all the work on the X-wing, but I've practically finished the Tie Fighter too.

My 3DS max has been crashing VERY often, so I've kept having to use the autoback saves to rescue my work. Some days it'll cooperate, some days it won't. 
As you can see, I've completely built up the arms of the ship (that was actually very fun) I've used the mirror tool a lot on both the X-wing and the Tie Fighter to get everything perfect. I'd align the pivot with something in the hierarchy tab, and then mirror the object  (or group) to get it perfectly symmetrical. It's such a useful tool. I love the way its turned out so far, although the ball in the middle looks very bare, so I'll finish adding the detail that you can see I've started in the picture (the dark blue) and add some to the front too. I still need to add lights (I think they're lights) on the back, and some sort of hatch onto the top. I'm considering cutting into the sphere with a tube for that.

Sunday, 1 November 2015

Week Five


Lambda

This week I started work on my Lambda shuttle, if only a very brief start. I created a rough body and head for the ship. To make the body, I used two cylinders and attached them to a box to get the rounded edges, and then I used the inset tool on the back to create a smaller face which I could pull out to make my own curve.


As you can see, this looked very blocky and I felt it wouldn't look that good so I used the MSmooth tool to smooth it around a little. I don't like the sheer amount of polygons it has added, but I think it looks better than the very blocky back on it. I think I may look to improve upon this later.


Tie Fighter


I also made a new simple tie fighter. I only created one wing and arm since I can use the mirror tool when its complete. I then worked on he detail on the panels of the wing, and the main window on the body. I'm actually really happy with how the window turned out, and my progress so far. I think the wings still look very bare though, so I'll have to add some more detail to the centre, and around the outside edge.


X-Wing

Finally for my X-Wing this week, I remade the body from scratch so it was perfectly symmetrical, and recreated the engine which I feel that I'd overcomplicated by using inset and extrude to create one long shape. Instead I now separated it into a couple of cylinders which not only looks better, but it allows me to shift them around a bit easier to find a good position for them.

Another thing that I've noticed that it makes such a difference when you change all the object colours to sort of the correct colours. I was very uneasy about how the whole ship looked until I changed the colours to grey (excuse the engine, as I was still working on it) and at that point it all sort of came together, and looked a lot nicer. It stopped me worrying a little bit also about how the finished ship would look.


Friday, 30 October 2015

Feedback on Chris' Blog

Feedback on Christopher Dean's blog ( http://starwarsanimationruskin.blogspot.co.uk/ )

I think the presentation of the blog is good, though the background image is slightly distracting. Lots of images are used which breaks up the text and makes it easier to digest and visualise, in addition to that it also - across several posts - shows the progression of the models, and how they are improved as the weeks go on.
I feel for an evaluative blog he may be describing his actions more than evaluating said actions a little too much, on the other hand it does show his overall progression as he does explain why he's done some things, and some of the thought processes behind it.
In Chris' week 5 post, I saw the way he modelled the engines seperately to the rest of the ship and then imported them. I'll keep this method in mind when I'm creating my models, however I do find it easier to see if something looks "right" by seeing it where it will be used, so on the other hand it may not be a very good fit for me personally. This was also why I liked how he showed pictures of the engines pre- and post- attachment, since it clearly demonstrated how he applied his method. In week 3's entry, I would have like to see at least one picture of his completed house, but this is just a minor nitpick.
Overall, I think Chris' blog is very good, so some recommendations I would give him would be to change the background slightly, and put in some more thoughts on his 'finished' products, and changes he's looking to make, or improvements he'd like.

Wednesday, 28 October 2015

Week Four

This week I really cracked down and got on making a full complete space ship. I decided to try the X wing as it didn't have the annoying window on the front like the Tie Fighter, and it seemed a little more challenging than the Lambda Shuttle.

As you can see, I managed to complete the one wing and the main body. I'm not very happy with the main body, as it's not symmetrical. I drew it using the plan as a form of tracing paper, and then used the extrude tool and connect tools (which I've developed a love of.) Since I drew it, it wasn't symmetrical and that bothered me for the rest  of construction. I tried to fix it by slicing the whole thing in half with the boolean tool, and then mirroring it, and joining the two halves, but it never looked quite right. Next time I'll ensure that it's perfect before extruding it.

When making the C shapes for the laser/blaster things, I cut a tube shape in half by deleting the vertices that comprised half of it. The problem with this was there was a missing polygon on the top and

bottom of the C shape, so I looked up a new tool which was cap. Cap added the missing polygon in if I selected the border option!
I'm very pleased with how the blasters, engine and wing in general turned out. I gave up on editing the engine any further as every time I tried to change it, 3DS max would crash and I was not very pleased. I have a ominous gut feeling that I'll regret using the extrude tool so frequently to make the engine and body of the blaster one large piece, however I'm not willing to touch the engine for a little while just in case the program crashes again. I'll look into cutting up the shape soon, since I think it would make adding detail to particular parts slightly easier.

I didn't actually add the three other wings to the ship as I know I can just copy and mirror the one wing I do create. It hasn't really felt complete to me yet so I'll wait until it does before I do copy it over.

The nose tip was very annoying to create as it's such an odd shape, I'm not 100% pleased with it, but I'm proud of creating it.

Another annoying feature is that clicking the lightbulb on a "group" of objects doesn't make the whole group invisible. I'm not sure if I'm missing an option or something, however so I'll look into that as well.